-
WitchCrafting (Spells for the Craft): Pagan Patches
Merry meet! This month’s WitchCrafting column is about something I have dreamed of doing for twenty years and I am now facing the fact I never will … so I’m passing along the idea in the hopes that someday someone somewhere will run with it – Pagan patches. When I was a newbie witch, I’d get excited when I’d “master” another skill. I found myself thinking a badge like those I earned in Girl Scouts would be so cool. I envisioned them for things like working with crystals, tarot, the elements, candle magic, and making my first spell jar. I thought about ones for each of the sabbats I celebrated…
-
SpellCrafting
Spells for the Craft: Peace Water Merry meet! Many of you are probably familiar with war water – typically made from iron nails or spikes left to rust in pond water along with another ingredient or two such as Spanish moss or wormwood. It’s used to drive away disruptive energy, and I have sprinkled it around the perimeter of my abode as a preemptive protective measure. Recently I learned of peace water. A hoodoo product, it brings peace, harmony, and gentleness to places, people or situations. It can create an energetic barrier, warding off negative entities and energies that would bring discord to your environment. It’s thought peace water draws…
-
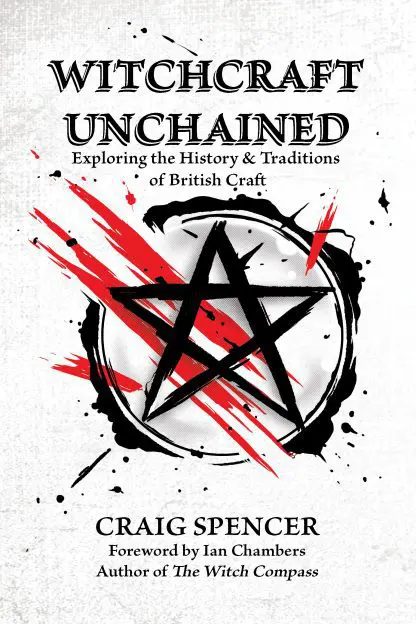
Book Review and Interview – Witchcraft Unchained by Craig Spencer
Book Review Witchcraft Unchained: Exploring the History and Traditions of British Craft Written by Craig Spencer Publisher: Crossed Crow Books 243 Pages Release Date: June 22, 2023 Bright Blessings, readers, When I saw this book was available to review, I jumped at it, and before I could say “thank you”, my editor sent it to me. Why did I specifically want to review this book? Because it is rare – rarer than rare. Today, few care about the history of the craft. Most pagans and witches want spell-books instead of learning about the roots of our craft. Some of us witches do want to learn, so…
-
Healing Oil Recipe
Healing Oil Recipe for Humans & Pets When it comes to my remedies my witch side comes to life. I have quite a few wise women in my lineage and I like to channel them when I offer any healing assistance or create remedies. My healing oil gets special attention in this area. It cleans wounds, speeds up tissue growth, and helps with bites and stings. I make it in bulk once a year, this way I can spend the year collecting the ingredients as I travel and charging them properly. A lot of work and energy goes into my healing oil. This infusion can be used on its own…
-
Spells, Potions, & Craft Excerpts from ‘The Little Witch’s Book of Spells’ by Ariel Kusby
In Your Hands You Hold an Enchanted Guidebook. . . . Welcome, magical one. Are you wondering how to cast magic spells? Would you like to be a witch? Well, you already are one if you wish to be. A witch is someone with special abilities. You do not necessarily need to possess the power to make objects fly or to read minds, though. It is your essential qualities—the elements of who you are—that are magical and can be used in witchcraft if you believe they are powerful. Your kindness, for example, or your intelligence. You are a witch if you feel somehow different or special, and believe that within…
-
Couple Begins a Wiccan Tradition, a Church and Projects to Preserve Both An Interview with Lisa Stewart, author of ‘Simply Wicca: A Beginner’s Guide to the Craft of the Wise’
An Interview with Lisa Stewart, author of ‘Simply Wicca: A Beginner’s Guide to the Craft of the Wise’ As young as four, Lisa Stewart began having paranormal experiences. “I set them aside while going through school because I didn’t want to be so different,” she said in a phone interview. In 1989 she came to The Craft of the Wise and began identifying as a witch. Nine years later, she met her husband online. He was living in England. “The first thing I asked him for was his birth information so I could run a natal chart. We had sixty-four compatibilities, so I thought, ‘I think I like…
-
Astrea Taylor: Interviewing an Intuitive Witch
During the Covid-19 Crisis, digital interviews have really come into their own! Many thanks to Astrea Taylor, witch and author of Intuitive Witchcraft, for taking the time out to talk to PaganPagesOrg about her book, her craft and more. Mabh Savage (MS): For those that haven’t yet read the book, can you tell us a little about what you mean by “The path without a path.” Astrea Taylor (AT): In paganism and witchcraft, there’s a lot of talk about the pagan path or the path of a witch. This concept is popularized in pagan media, with book covers or blog photos depicting a forested path. If you unpack…
-
Pagan Events At Home Online Events
The UK Pagan Federation has put together a wealth of activities to join in with whilst safe at home. Every day of the week has had a different focus, with May looking to be the home for a range of Beltane themed “Garden Party” events, videos and talks. Over the last few weeks the Pagan Federation has run a mammoth schedule of daily events aimed at keeping the Pagan community engaged, supported and entertained. The schedule ran Monday to Friday as follows: Monday: Videos from various members of the Pagan Community Tuesday: A weekly online ritual to promote strength, peace, wellness, hope and resilience. Wednesday: Batty Nan’s Crafty Circle,…
-
Season of Tender Roots: Belonging – An Excerpt from ‘Seasons of Moon and Flame’ by Danielle Dulsky
Season of Tender Roots: Belonging An Excerpt from ‘Seasons of Moon and Flame’ by Danielle Dulsky As a young woman, beloved witch, author, and teacher Danielle Dulsky found refuge, nurturance, and wisdom when visiting her grandmother’s rustic home. Next to the fire of the winter hearth and sitting outside with the wildflowers of spring, her anorexic body was loved and fed, her racing thoughts were slowed, and she received a maternal support she did not have in any other part of her life. These visits with Grandmother Grace were the seeds that eventually grew into Danielle’s deepening exploration into the Sacred Hag archetype and the wisdom that these elder…